Call 0413 650 514

Completed work

Waterproofing and tiling projects across Greater Brisbane.

Bathroom, balcony and wet-area waterproofing and tiling across Greater Brisbane. See site photos of preparation, repair stages and finished work where recorded. Call Riley on 0413 650 514 with your suburb and photos to discuss the scope and arrange a quote.

Recent Mel One work · In progress

Shower strip-out and substrate preparation

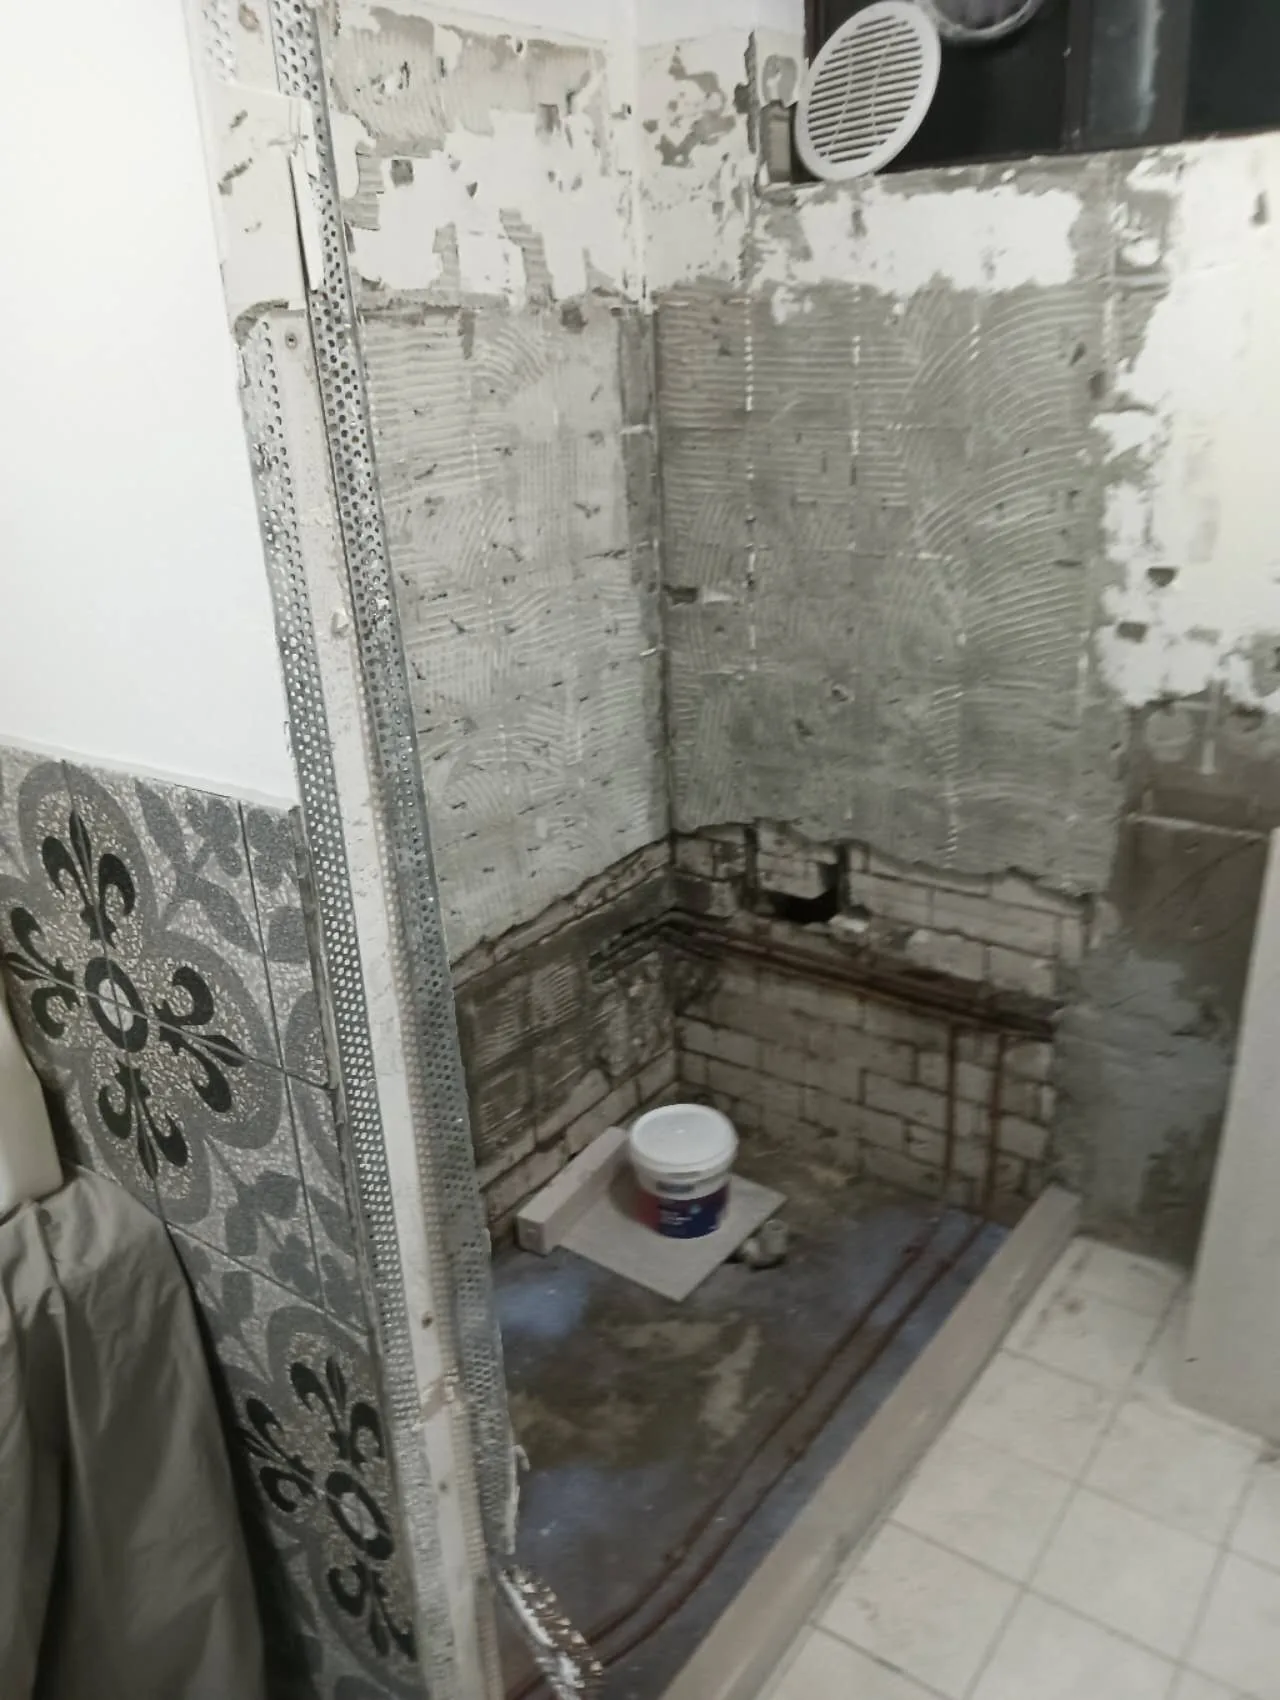
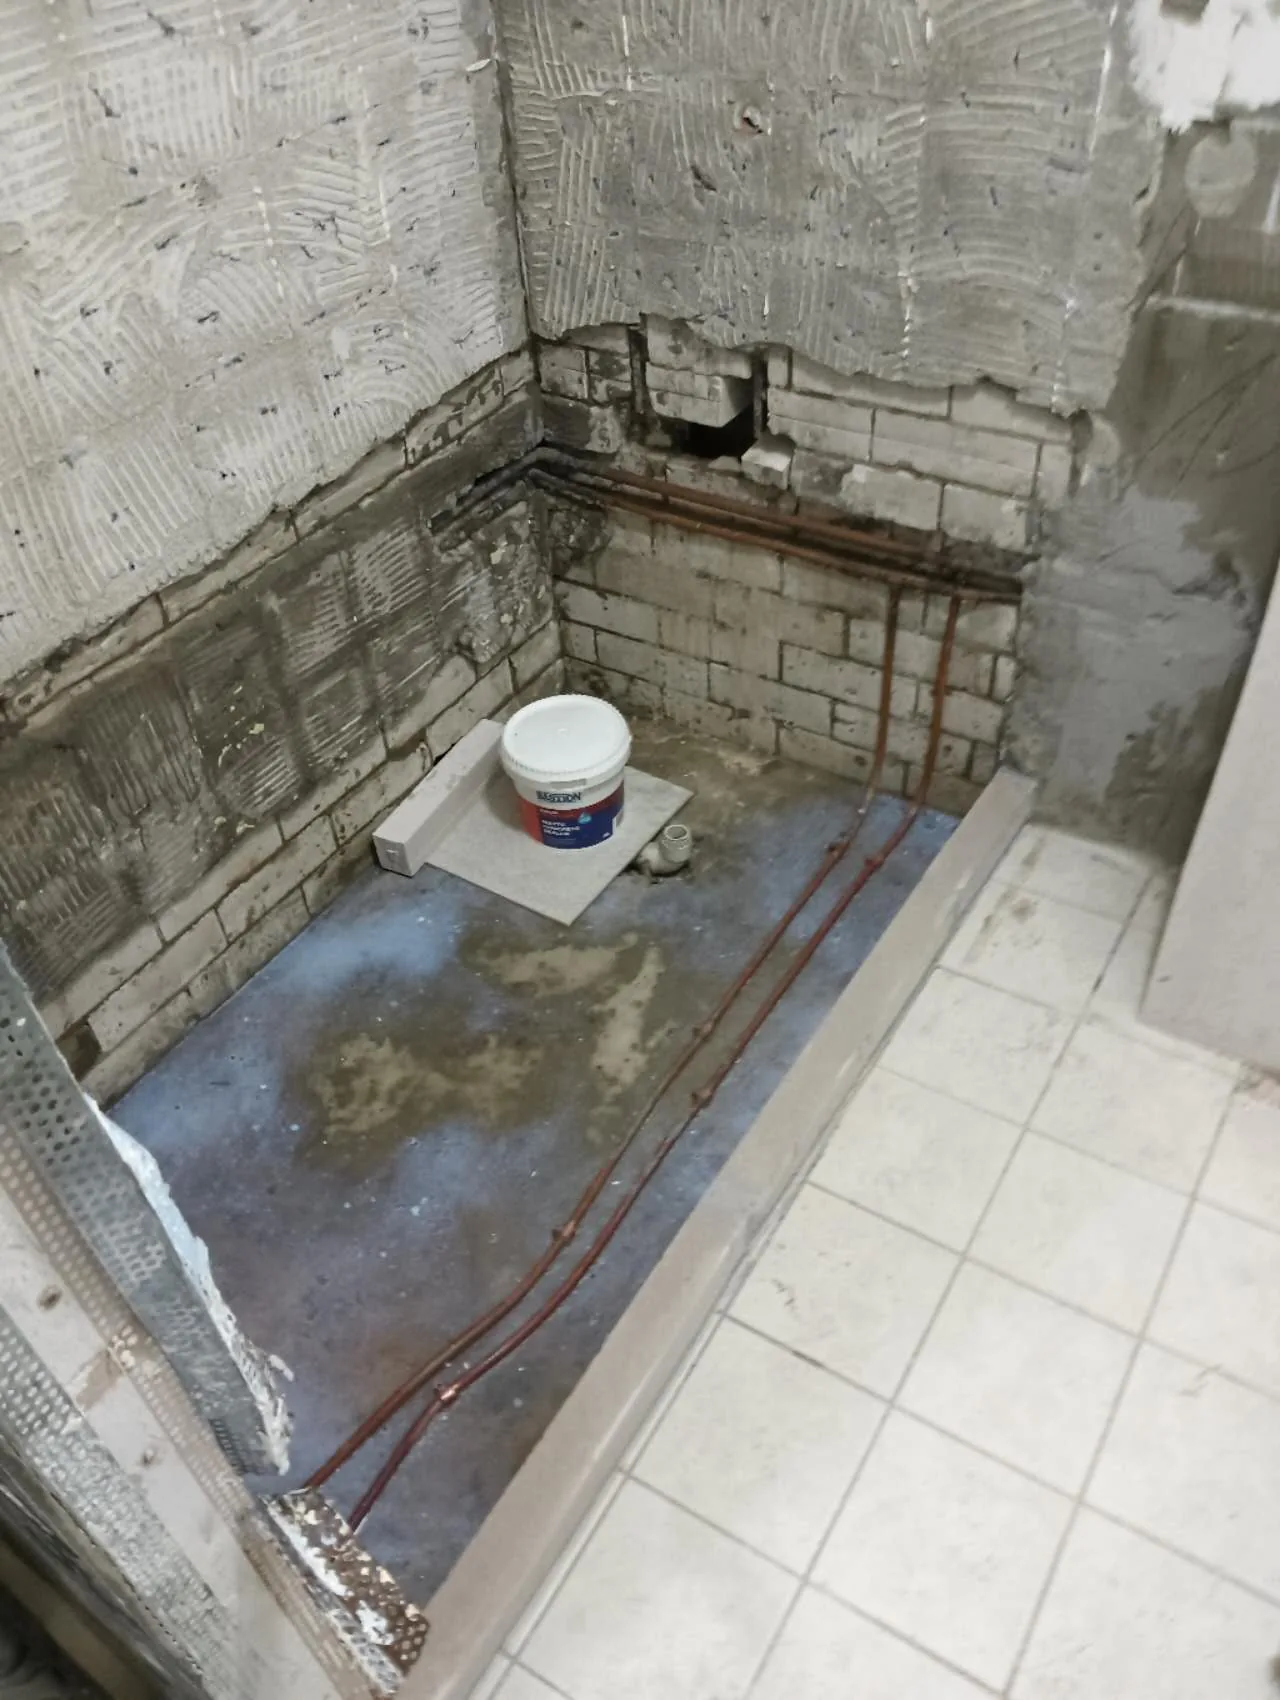
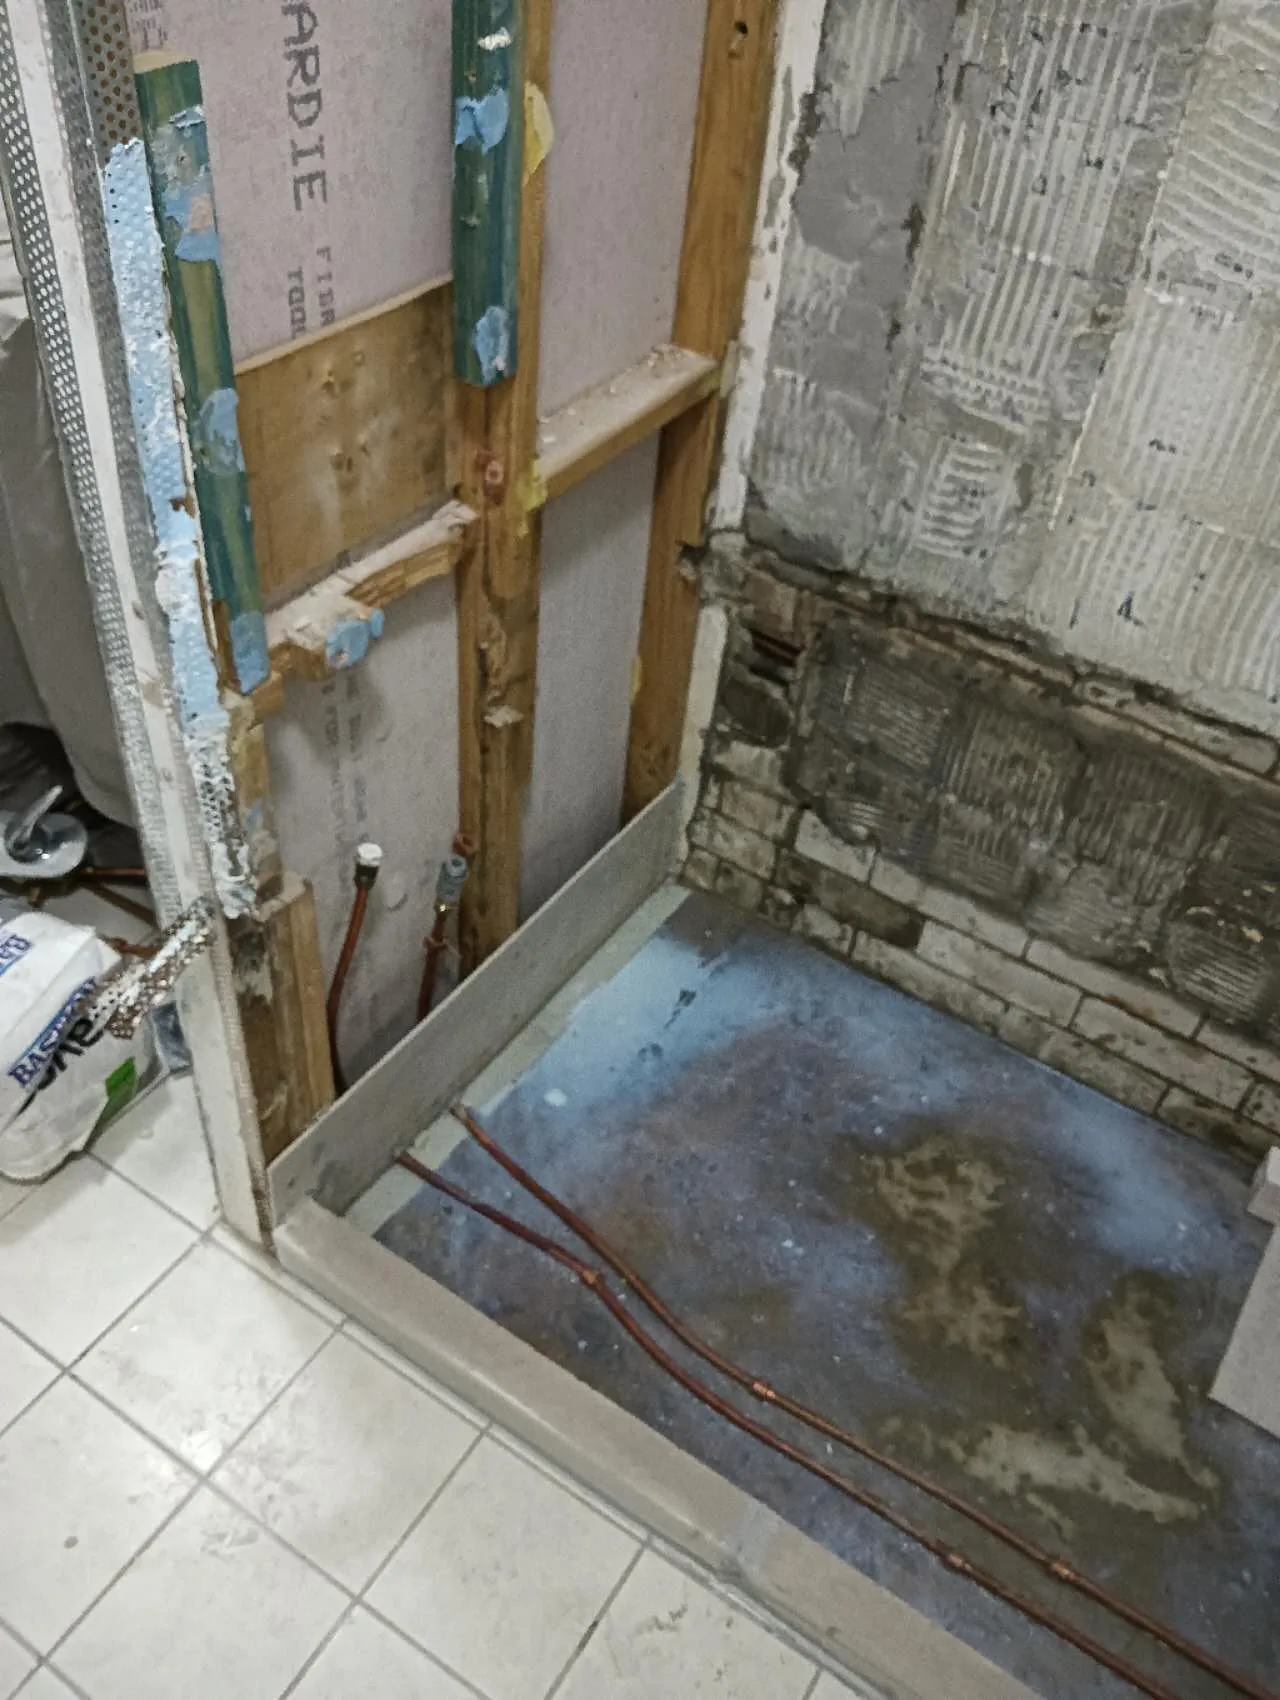
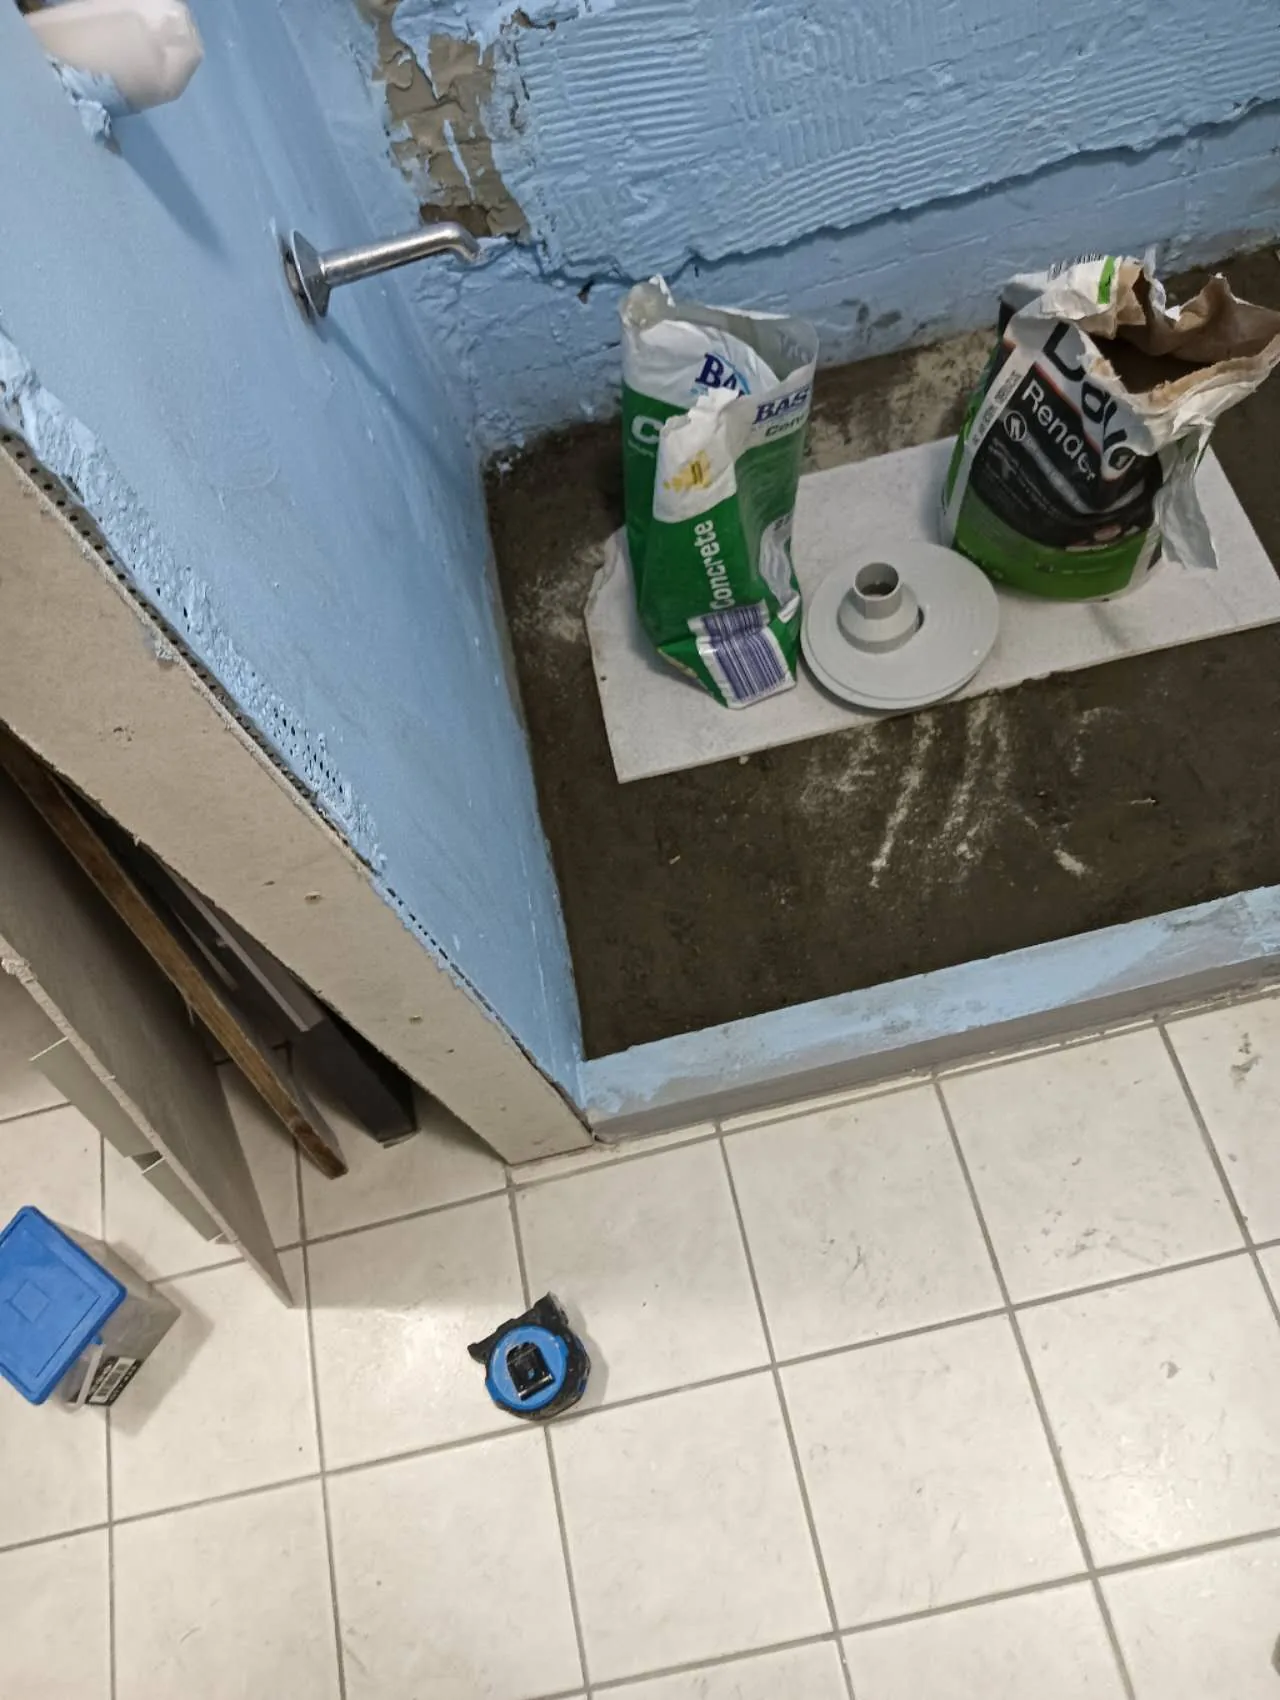
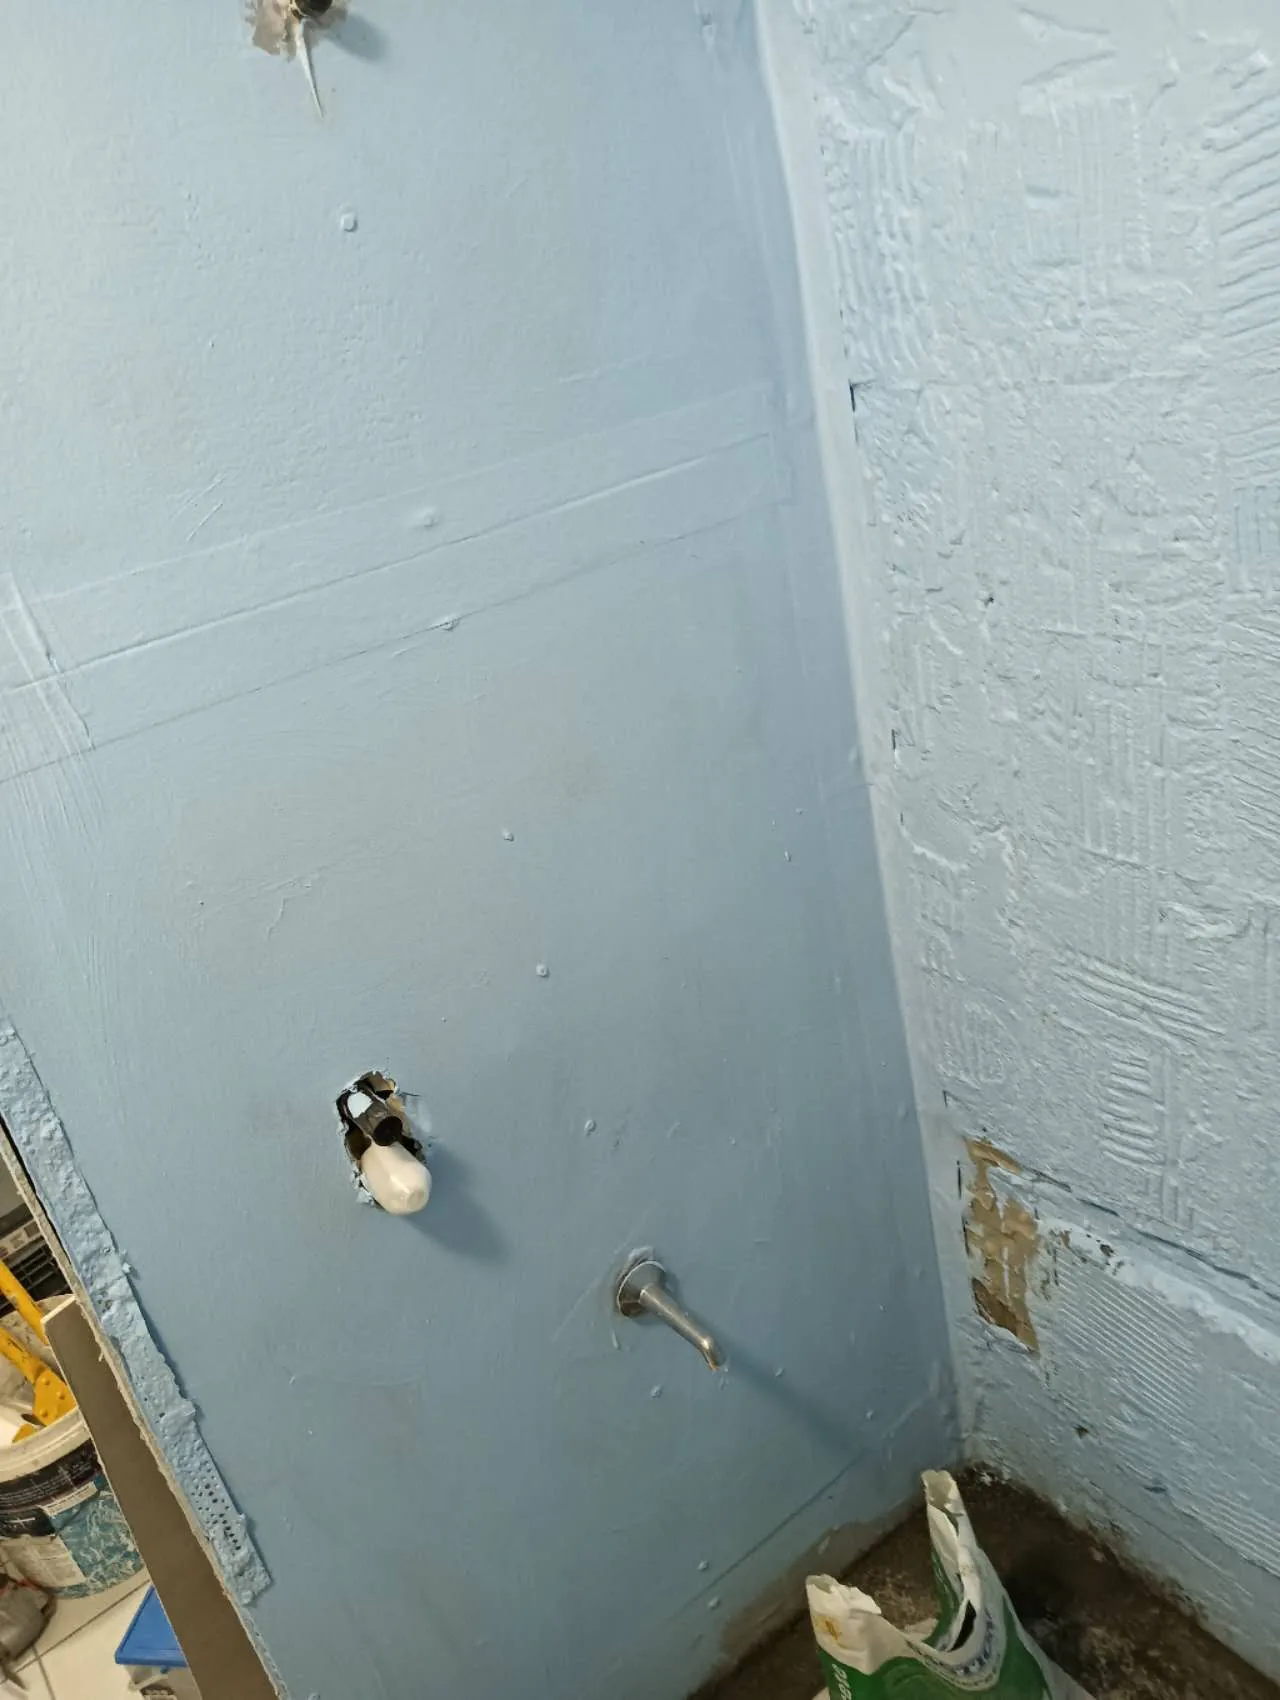
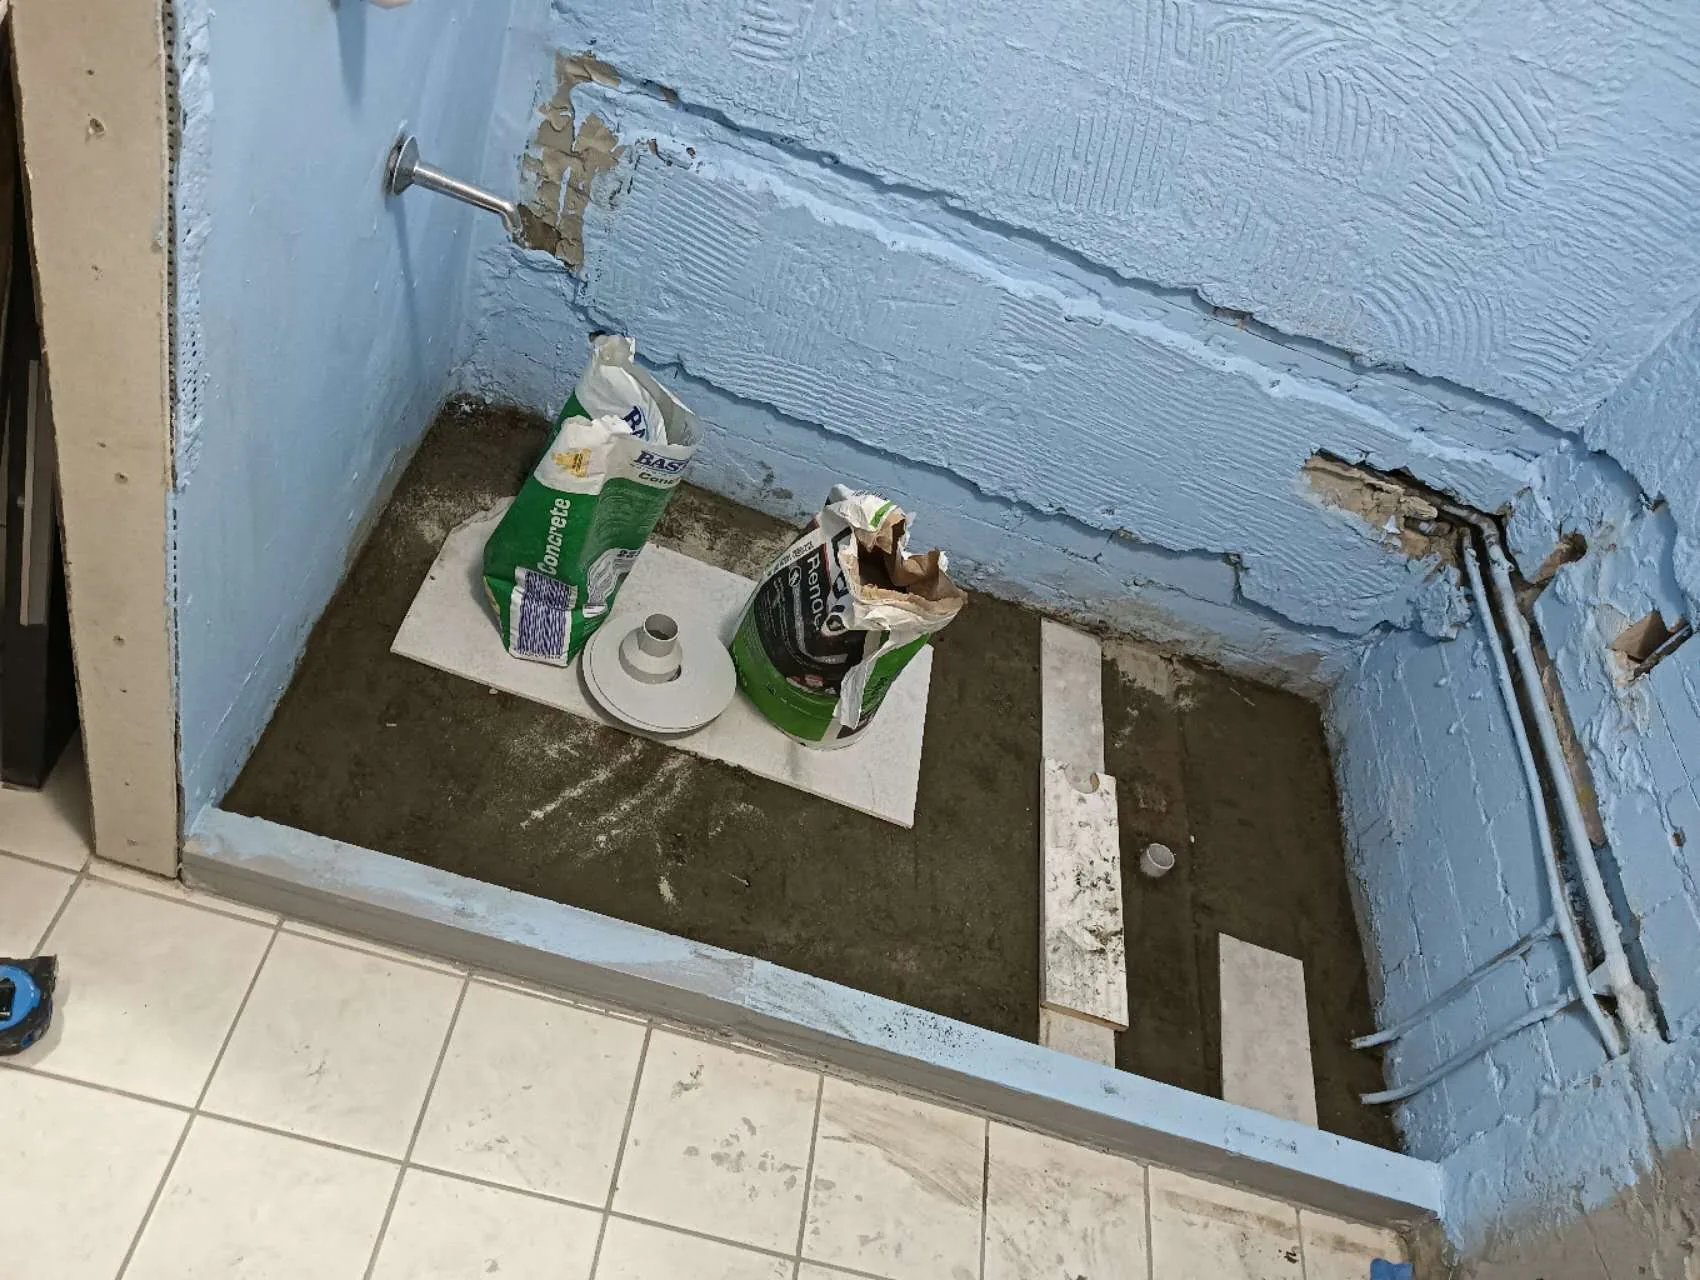
Six site photos record the strip-out and preparation stages of a shower. Removed tiles and fittings expose masonry, wall framing, copper pipe routes and the drain position. Further preparation views show blue coating on wall surfaces. The floor, openings and some adjoining surfaces remain unfinished.

The shower after wall tiles and fittings have been removed, with remaining adhesive, masonry and the floor area exposed.

Shower strip-out

The shower after wall tiles and fittings have been removed, with remaining adhesive, masonry and the floor area exposed.

Copper pipe routes and the existing wall surface are visible within the opened shower area.

Pipework access

Copper pipe routes and the existing wall surface are visible within the opened shower area.

An opened framed wall, adjoining masonry, exposed pipework and the unfinished shower base are shown together.

Opened wall and base

An opened framed wall, adjoining masonry, exposed pipework and the unfinished shower base are shown together.

Blue coating is visible on the lower walls and shower hob, while the floor area remains unfinished.

Base preparation view

Blue coating is visible on the lower walls and shower hob, while the floor area remains unfinished.

A closer preparation view shows blue wall coating, fitting openings and exposed sections around the pipe routes.

Wall preparation detail

A closer preparation view shows blue wall coating, fitting openings and exposed sections around the pipe routes.

A wider view records the wall preparation, floor waste, shower hob and building materials before the finishes are closed up.

Work in progress

A wider view records the wall preparation, floor waste, shower hob and building materials before the finishes are closed up.

Strip-out and substrate preparation are part of a shower repair. Base and wall repairs, plumbing, waterproofing and tiling are separate parts of the scope to confirm after site assessment.

Bathroom project

Bathroom waterproofing and tiling

One bathroom followed through strip-out, substrate preparation, waterproofing, wall and floor tiling, fixture installation and completion.

  • Original bathroom and strip-out
  • Prepared wet-area surfaces
  • Waterproofing membrane
  • Completed tiled bathroom
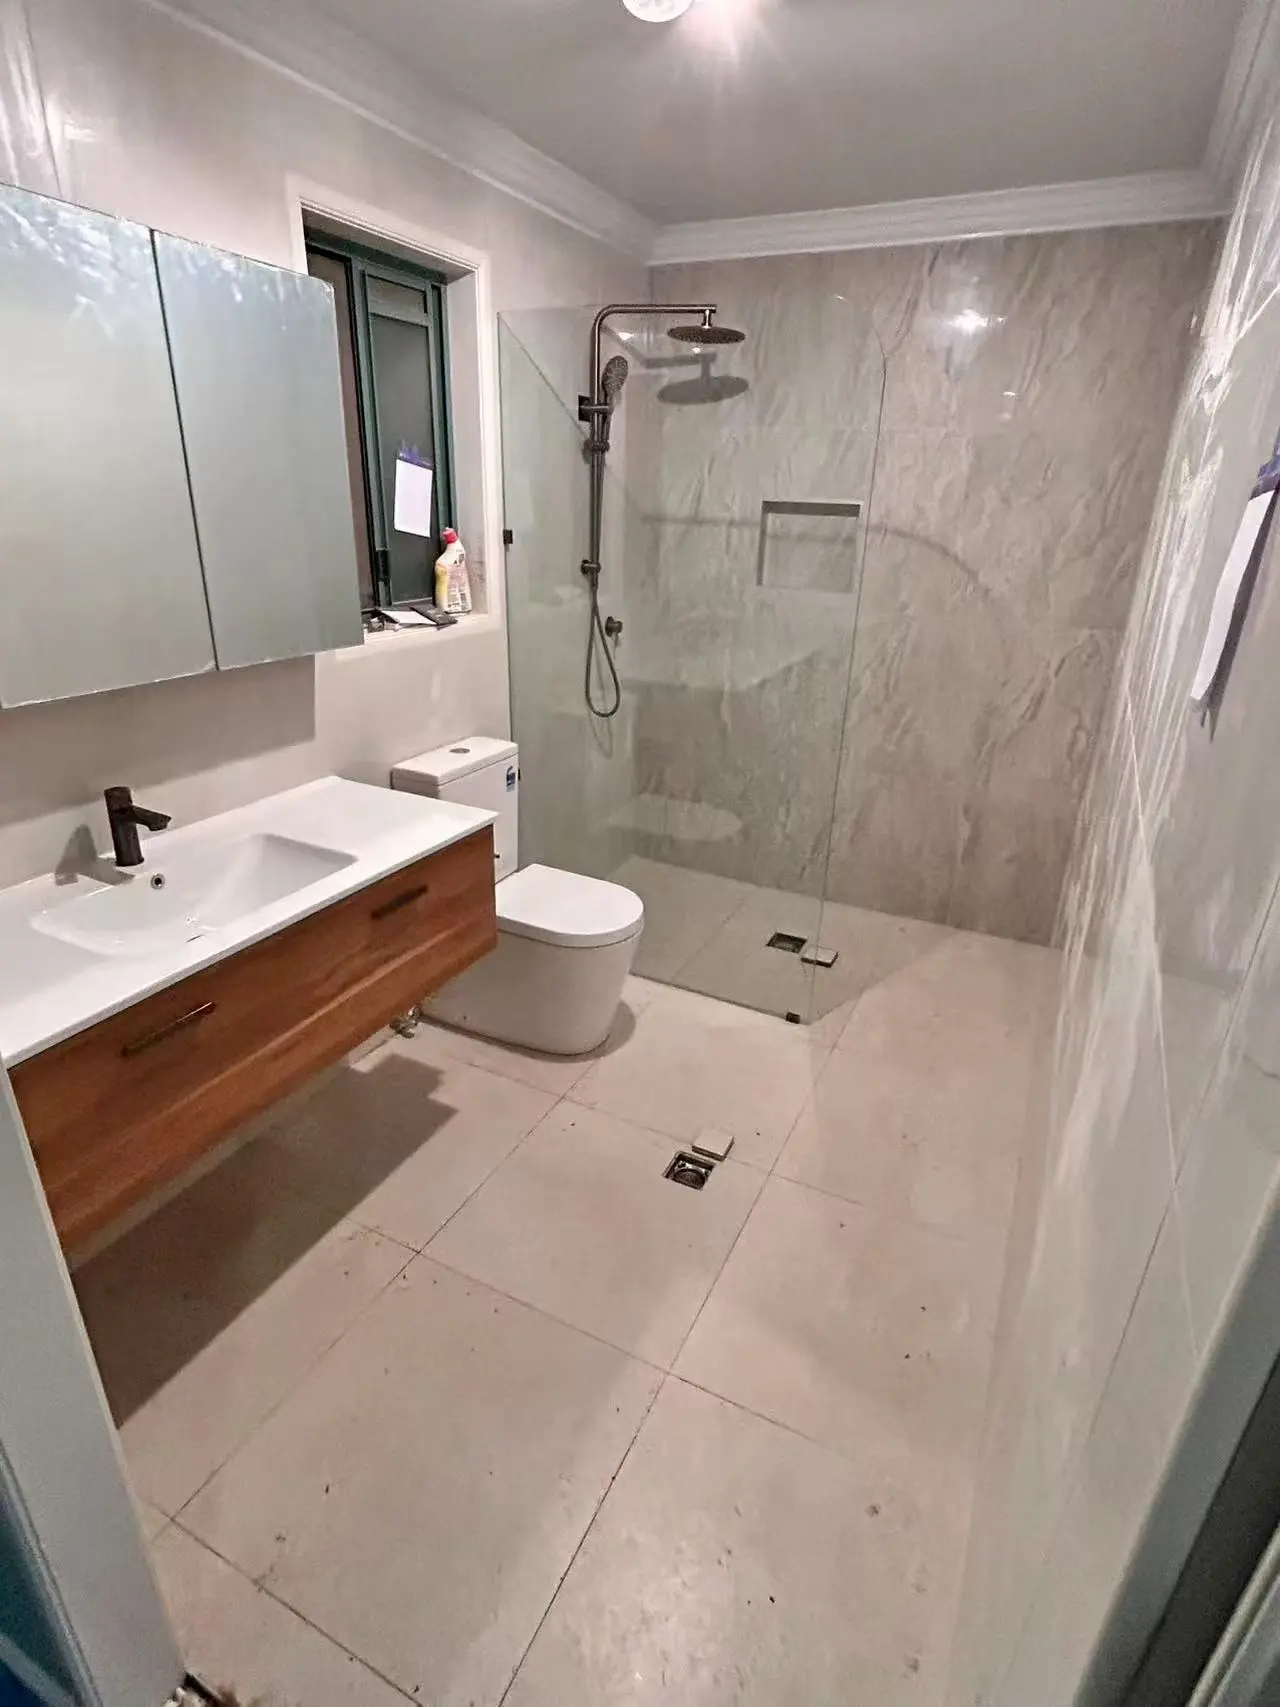
Completed tiled bathroom with timber vanity, toilet and walk-in shower
Completed bathroom — open the project for the full construction sequence.
View the full project Bathroom waterproofingBathroom tiling

Balcony project

Balcony waterproofing membrane

One balcony followed from the prepared surface through threshold and edge reinforcement, blue membrane application and the completed waterproofing layer.

  • Prepared balcony surface
  • Threshold and edge reinforcement
  • Blue waterproofing membrane
  • Completed waterproofing membrane
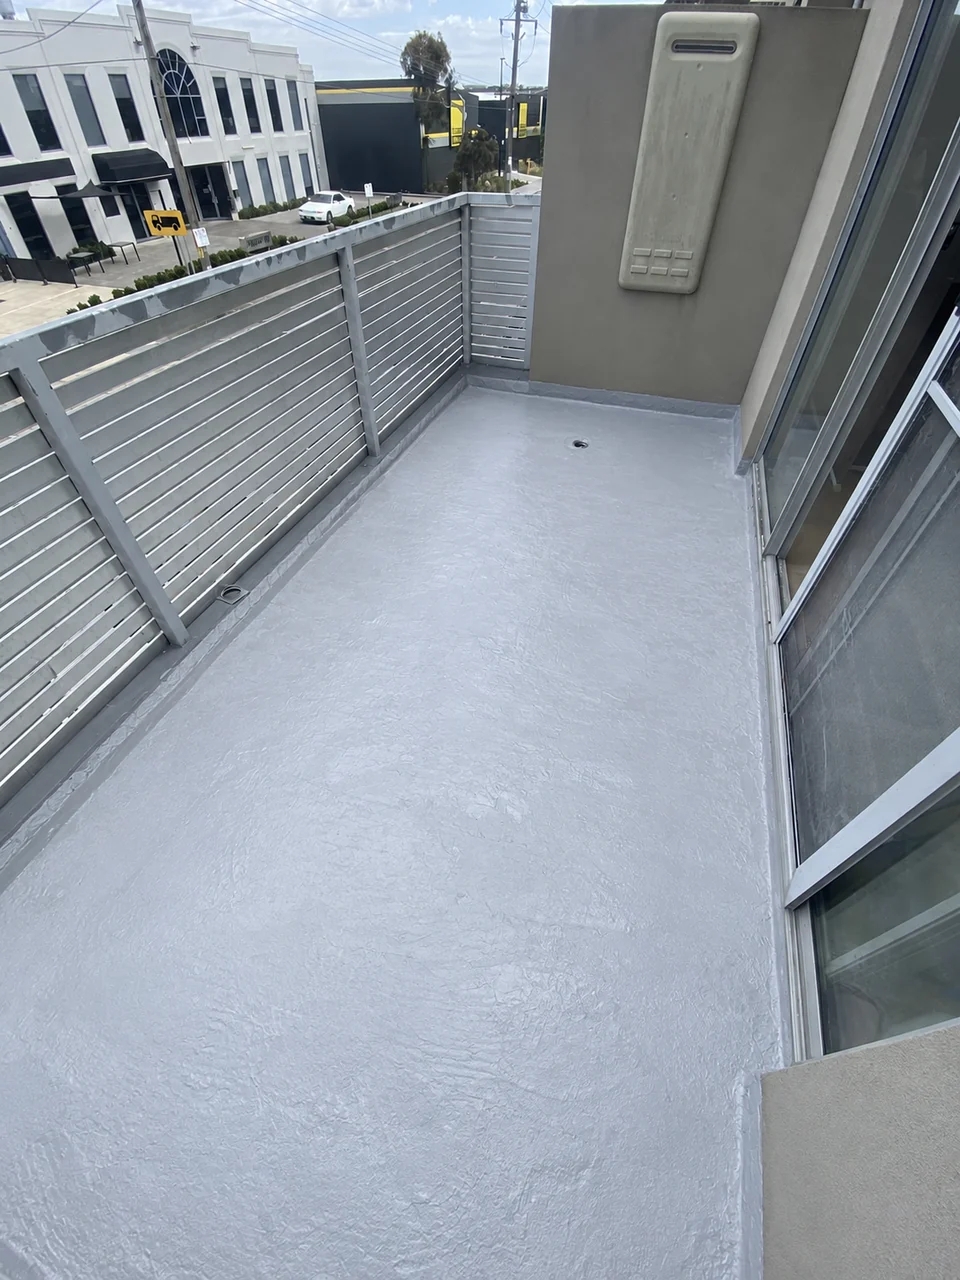
Completed waterproofing membrane across a balcony floor and perimeter junctions
Completed membrane — open the project to compare the prepared surface.
View the full project Balcony waterproofing

Balcony repair record

Balcony rot repair and strip-out

A leaking tiled balcony over an entry, opened up after water marks and ceiling cracks below. The record shows the decayed timber found beneath the tiles and the protection set up before the rebuild.

  • Entry staining and ceiling cracks
  • Decayed timber after lifting tiles
  • Strip-out to the framing
  • Protection before the rebuild
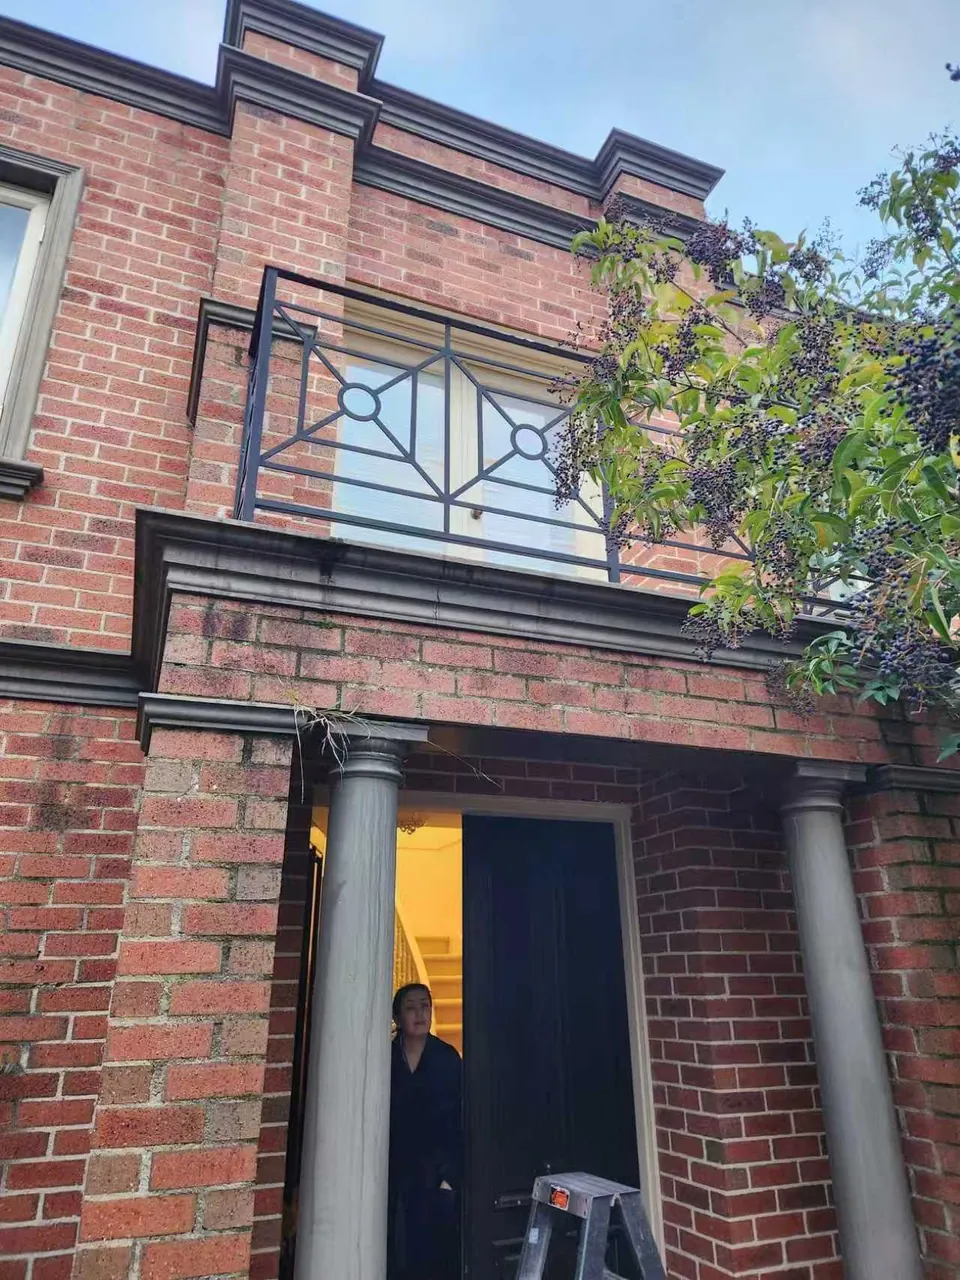
Brick house entry with a tiled balcony above the doorway, staining on the brickwork and weeds at the balcony edge
Entry below the balcony — open the record for the strip-out stages.
View the full record Balcony waterproofing

Local material repairs

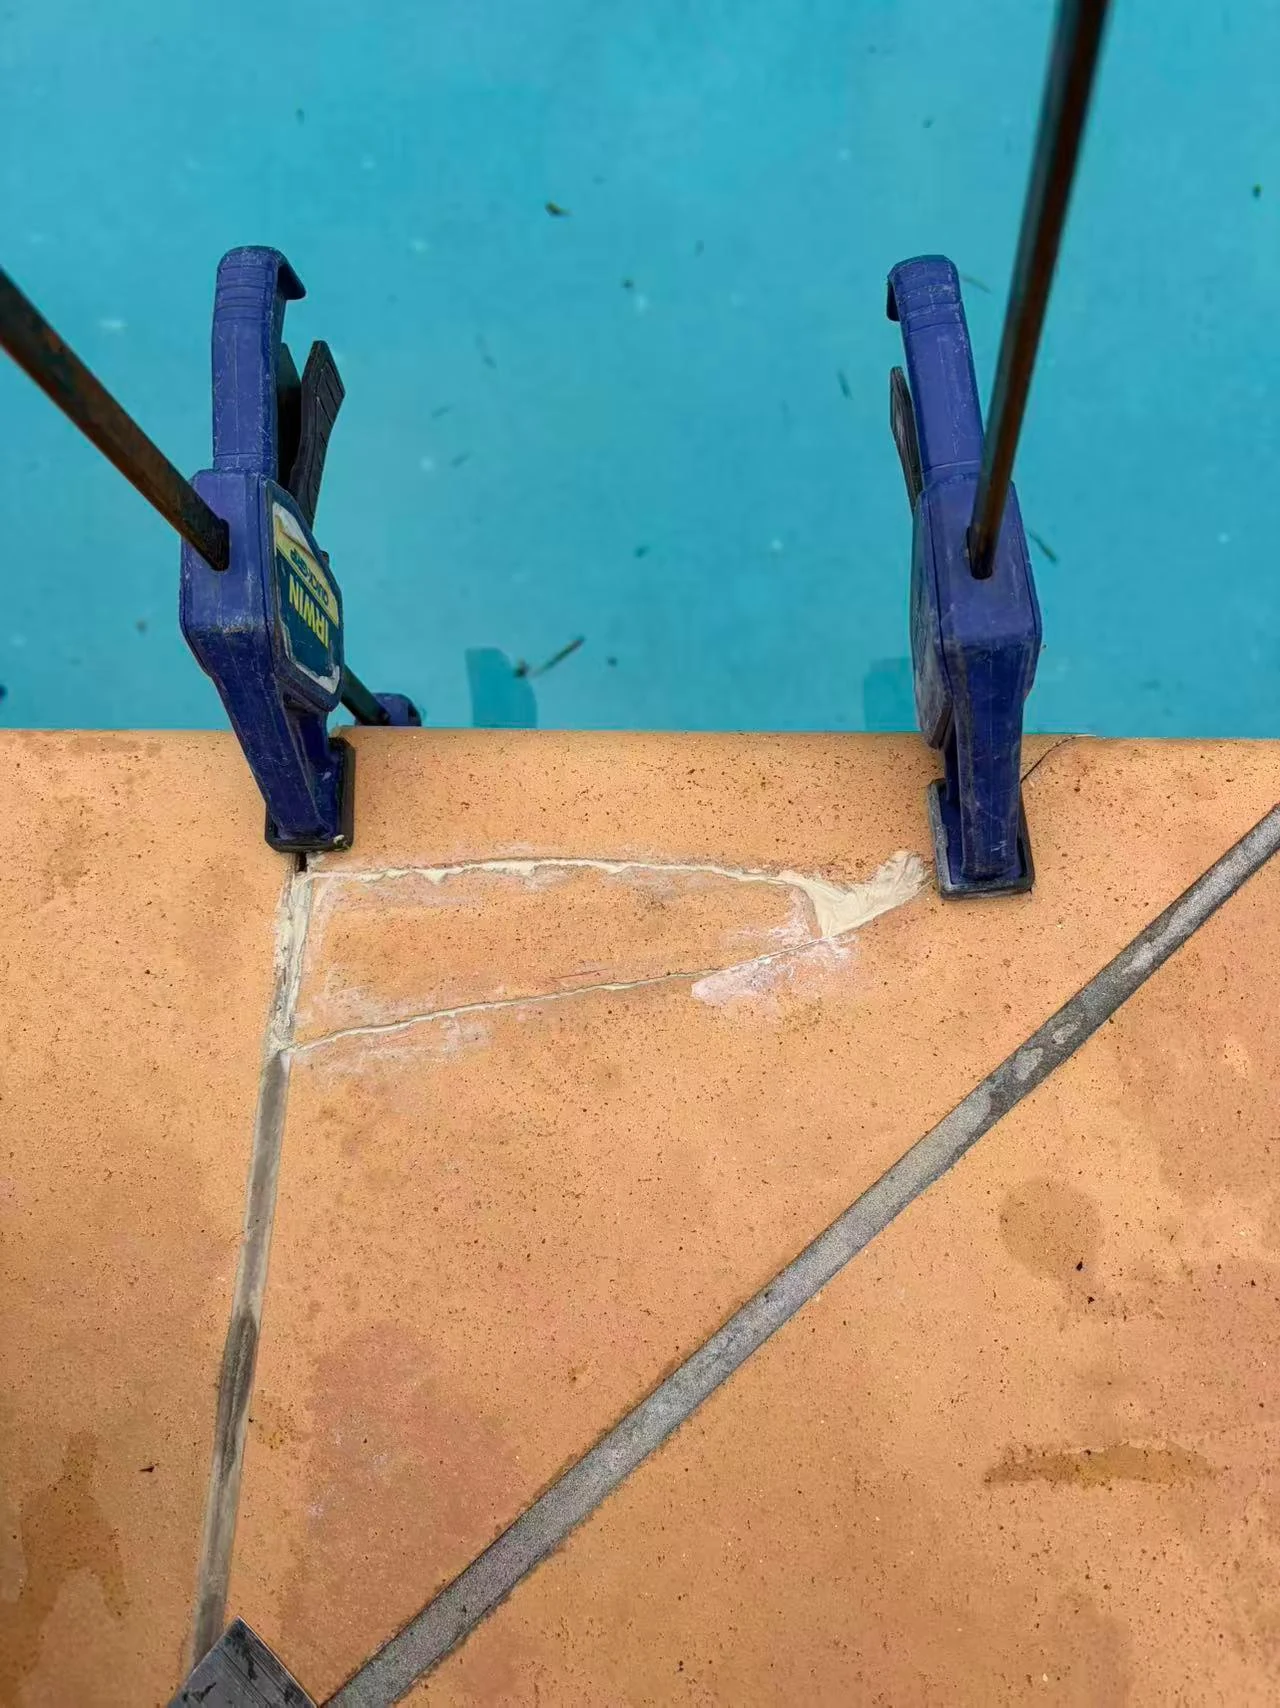
Pool coping tile: damage and repair in progress

Maintenance does not always require a complete replacement. These photos show a local repair retaining the existing pool-edge tile. Suitability depends on the tile, its supporting surface and neighbouring joints. The assessment compares repair, individual tile replacement and wider replacement against the intended use and budget.

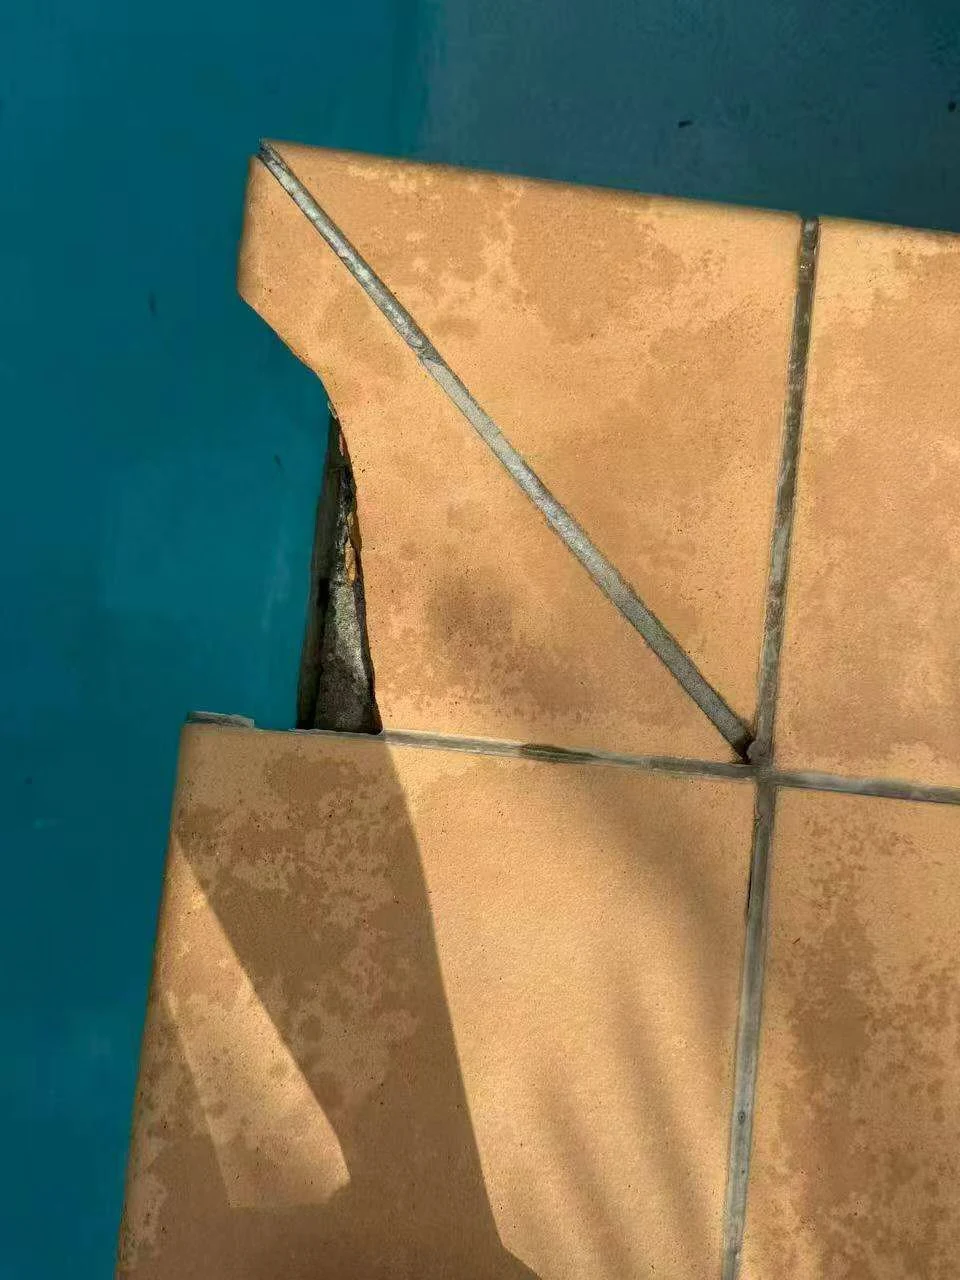
Broken pool-edge tile before repair

Broken pool-edge tile before repair

The corner piece is broken and a gap is visible along the pool edge.

Local tile repair in progress

Local tile repair in progress

Clamps hold the repaired section while the bonding material sets. This is a work-in-progress photo.

These photos record a local pool-edge tile repair, with clamps holding the repair while the material cures. A local repair may leave a visible line. Pool structure or overall waterproofing concerns need a separate assessment and scope. Tell us where the damage or movement appears and we can discuss the appropriate next step; safely taken photos can help if available.

See local tile repair and outdoor tiling services →

Discuss a tile repair

Completed tiling records

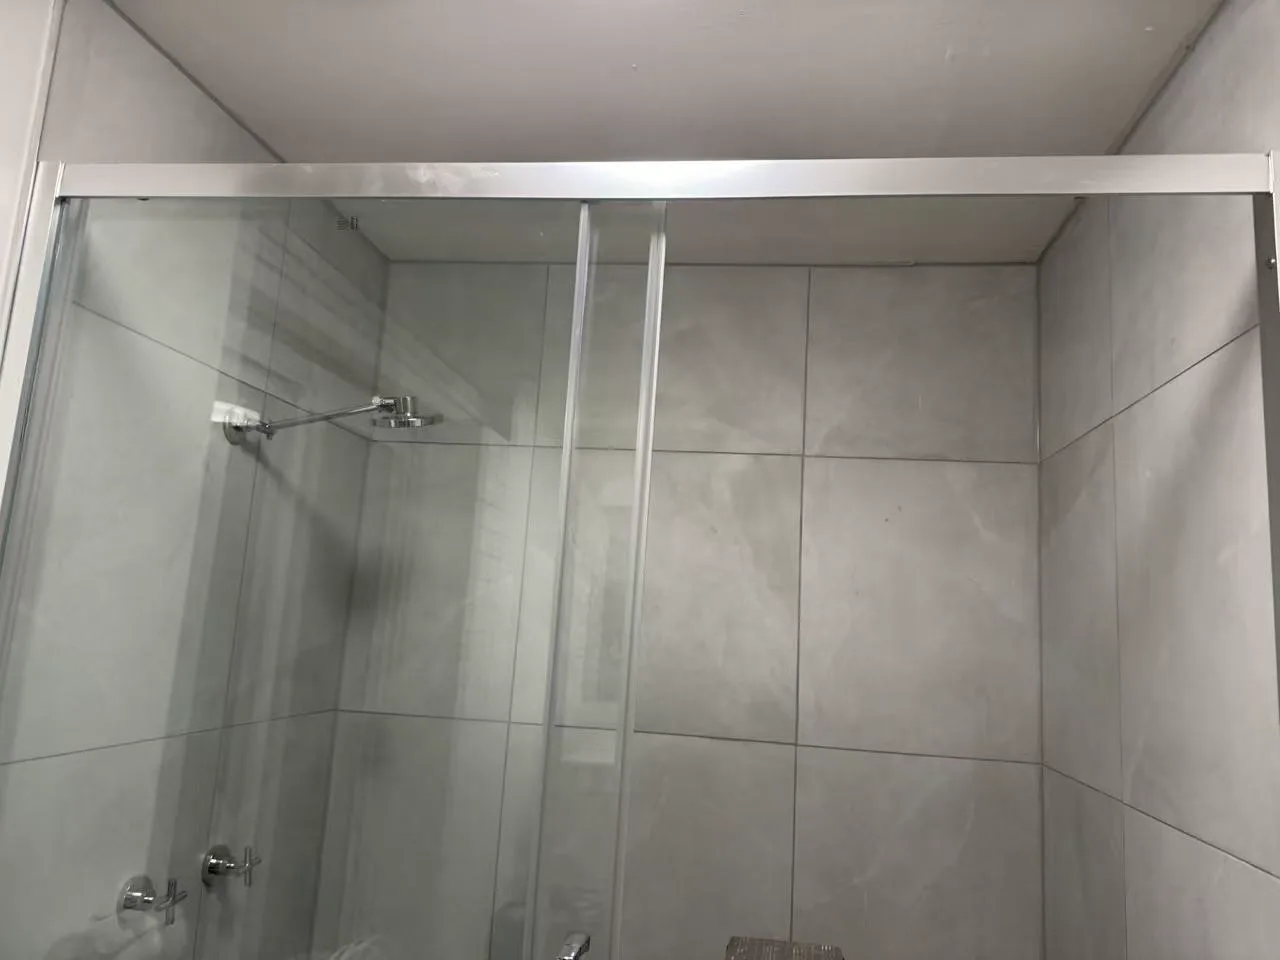
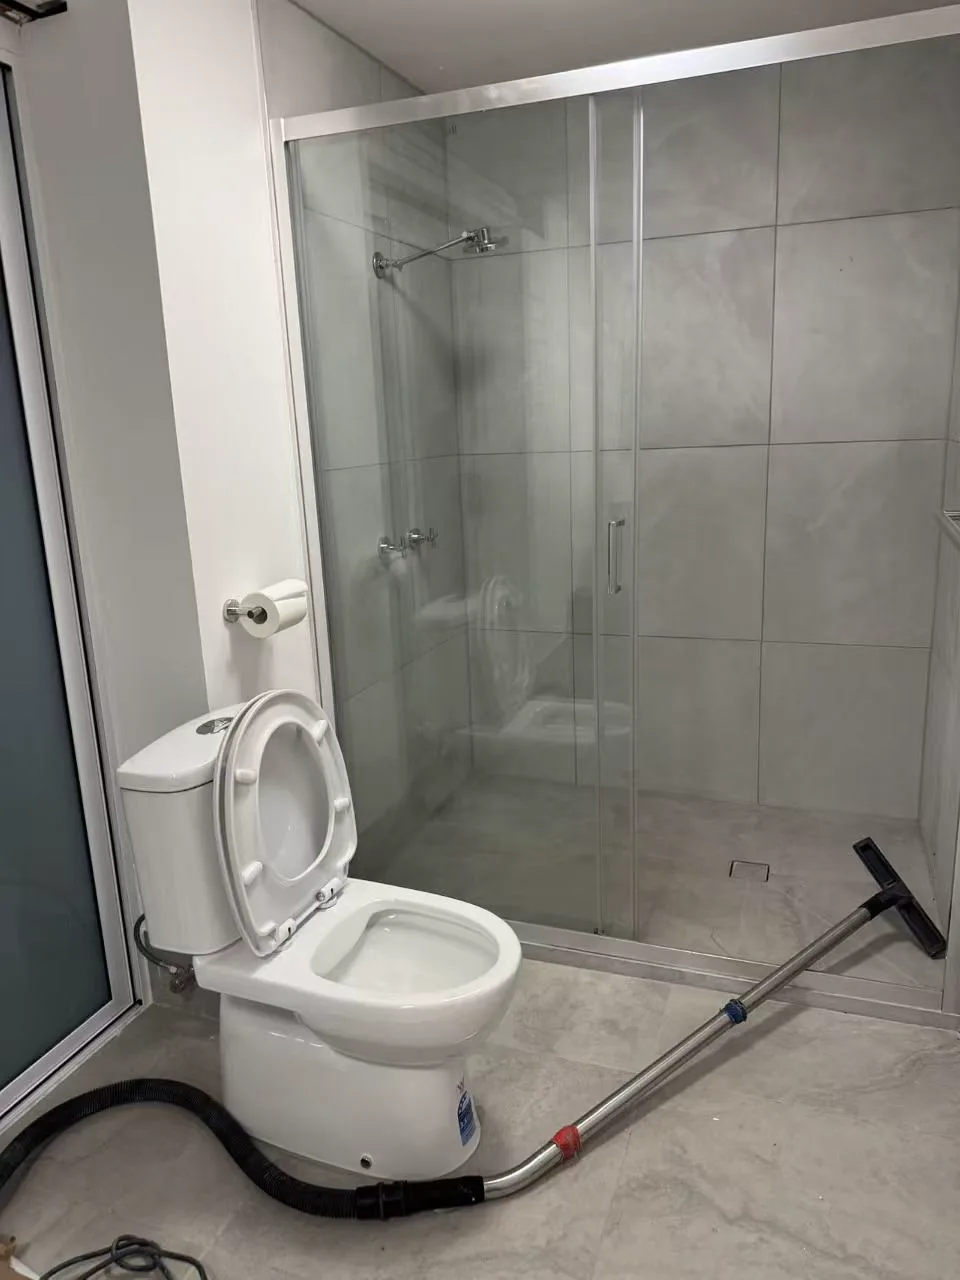
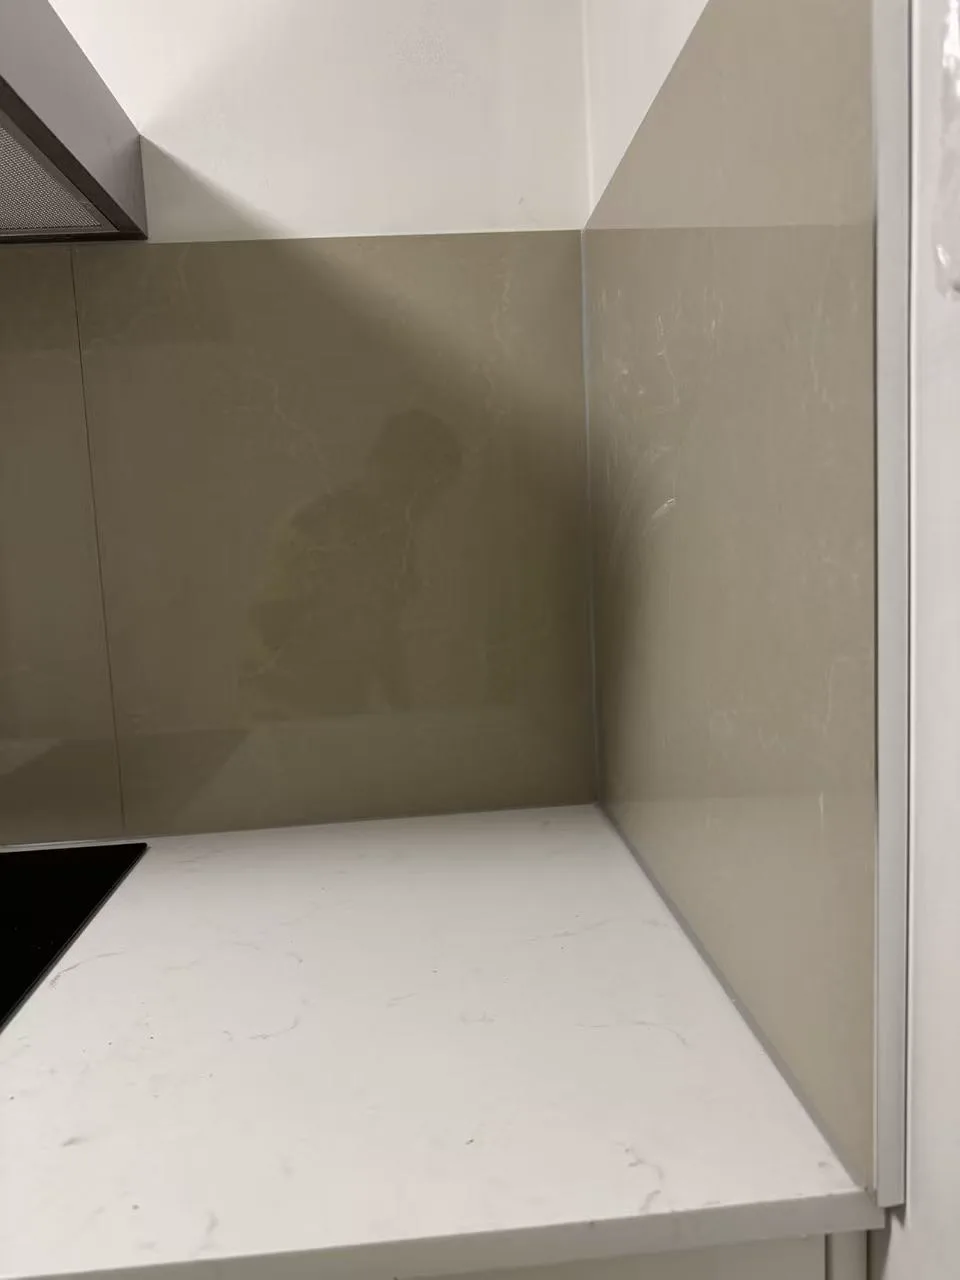
A grey-tiled bathroom and a glazed splashback corner

These photos record two surfaces after tiling was completed: the large-format grey wall tile, floor tiling and fixtures of one bathroom, and the internal corner of a kitchen splashback in glazed beige tile. Both sets begin after the screed and waterproofing stages, so they contain no substrate, membrane or in-progress tiling photos, and no waterproofing method or test result is inferred from them.

Shower screen over large-format grey wall tiles

Shower screen over large-format grey wall tiles

Completed wall tiling behind the shower screen, with the shower arm and mixer set into the tiled surface.

Finished bathroom with shower, toilet and tiled floor

Finished bathroom with shower, toilet and tiled floor

The same bathroom from the door: shower enclosure, floor tiling, floor waste and the toilet beside it.

Glazed beige splashback tiles meeting at an internal corner

Glazed beige splashback tiles meeting at an internal corner

A kitchen splashback in glazed beige tiles, cut into the internal corner where it meets the stone benchtop and the black cooktop.

If you are comparing a bathroom renovation with a local tile repair: any change to the shower or floor finish usually runs as one continuous scope of strip-out, levelling, waterproofing and tiling, while a single drummy or damaged tile is better assessed as a local repair. Tell us the room, the tile size and whether water shows through the floor or wall and we can confirm which stage needs checking.

Discuss bathroom tiling

Planter waterproofing work record

Clearing a planter and applying its waterproofing lining

This short site video records clearing an existing planter, applying its waterproofing layer, protecting the work from rain and the completed lining. Retaining usable existing construction and selecting a treatment for the site conditions can be an option to assess alongside full replacement.

A planter assessment needs to consider the substrate, drainage outlets, wall junctions and material suitability together. The video records work stages; it does not document a completed water test or promise a particular service life. Share an overview, the drainage location and adjoining wall details when enquiring.

See condition, drainage and waterproofing scope assessment →

Discuss waterproofing work
Site footage: clearing, lining work and the completed visible surface.

Construction record · Work in progress

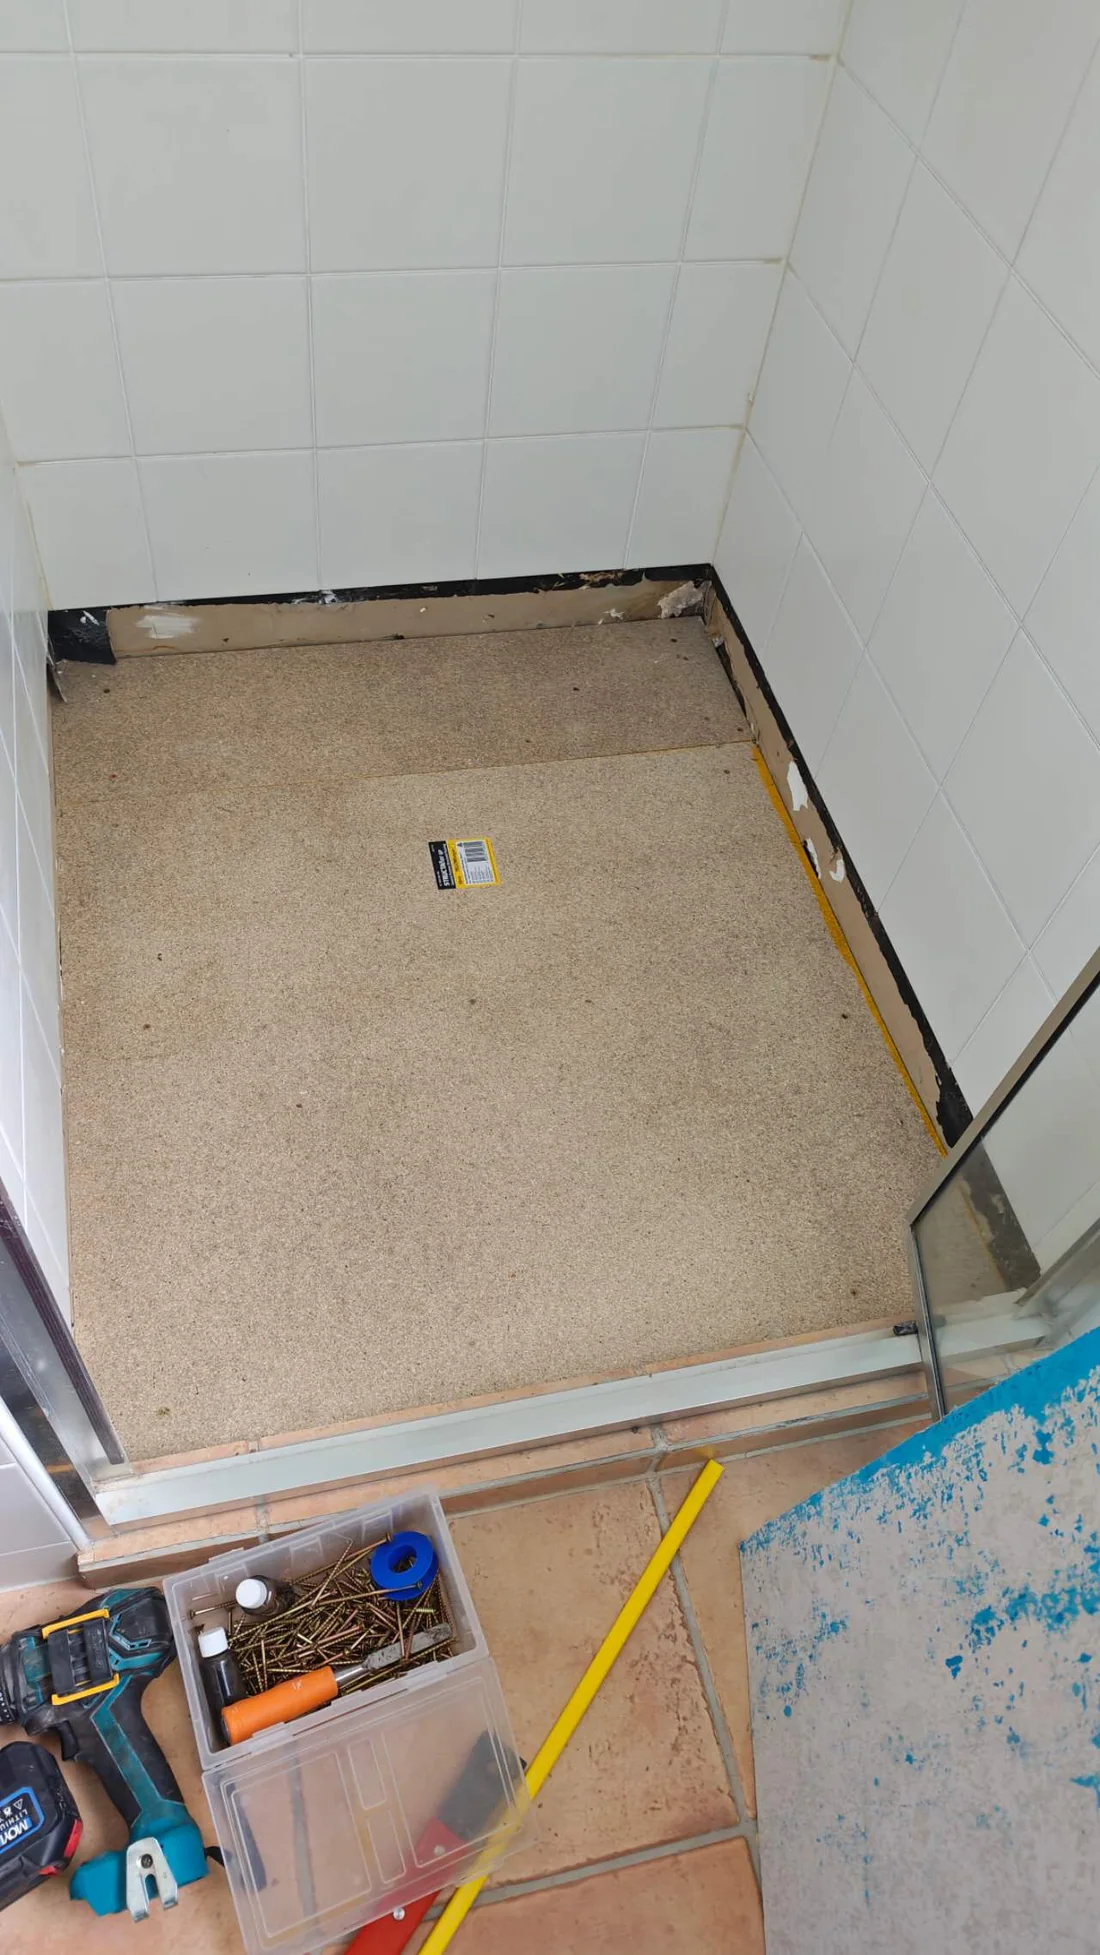
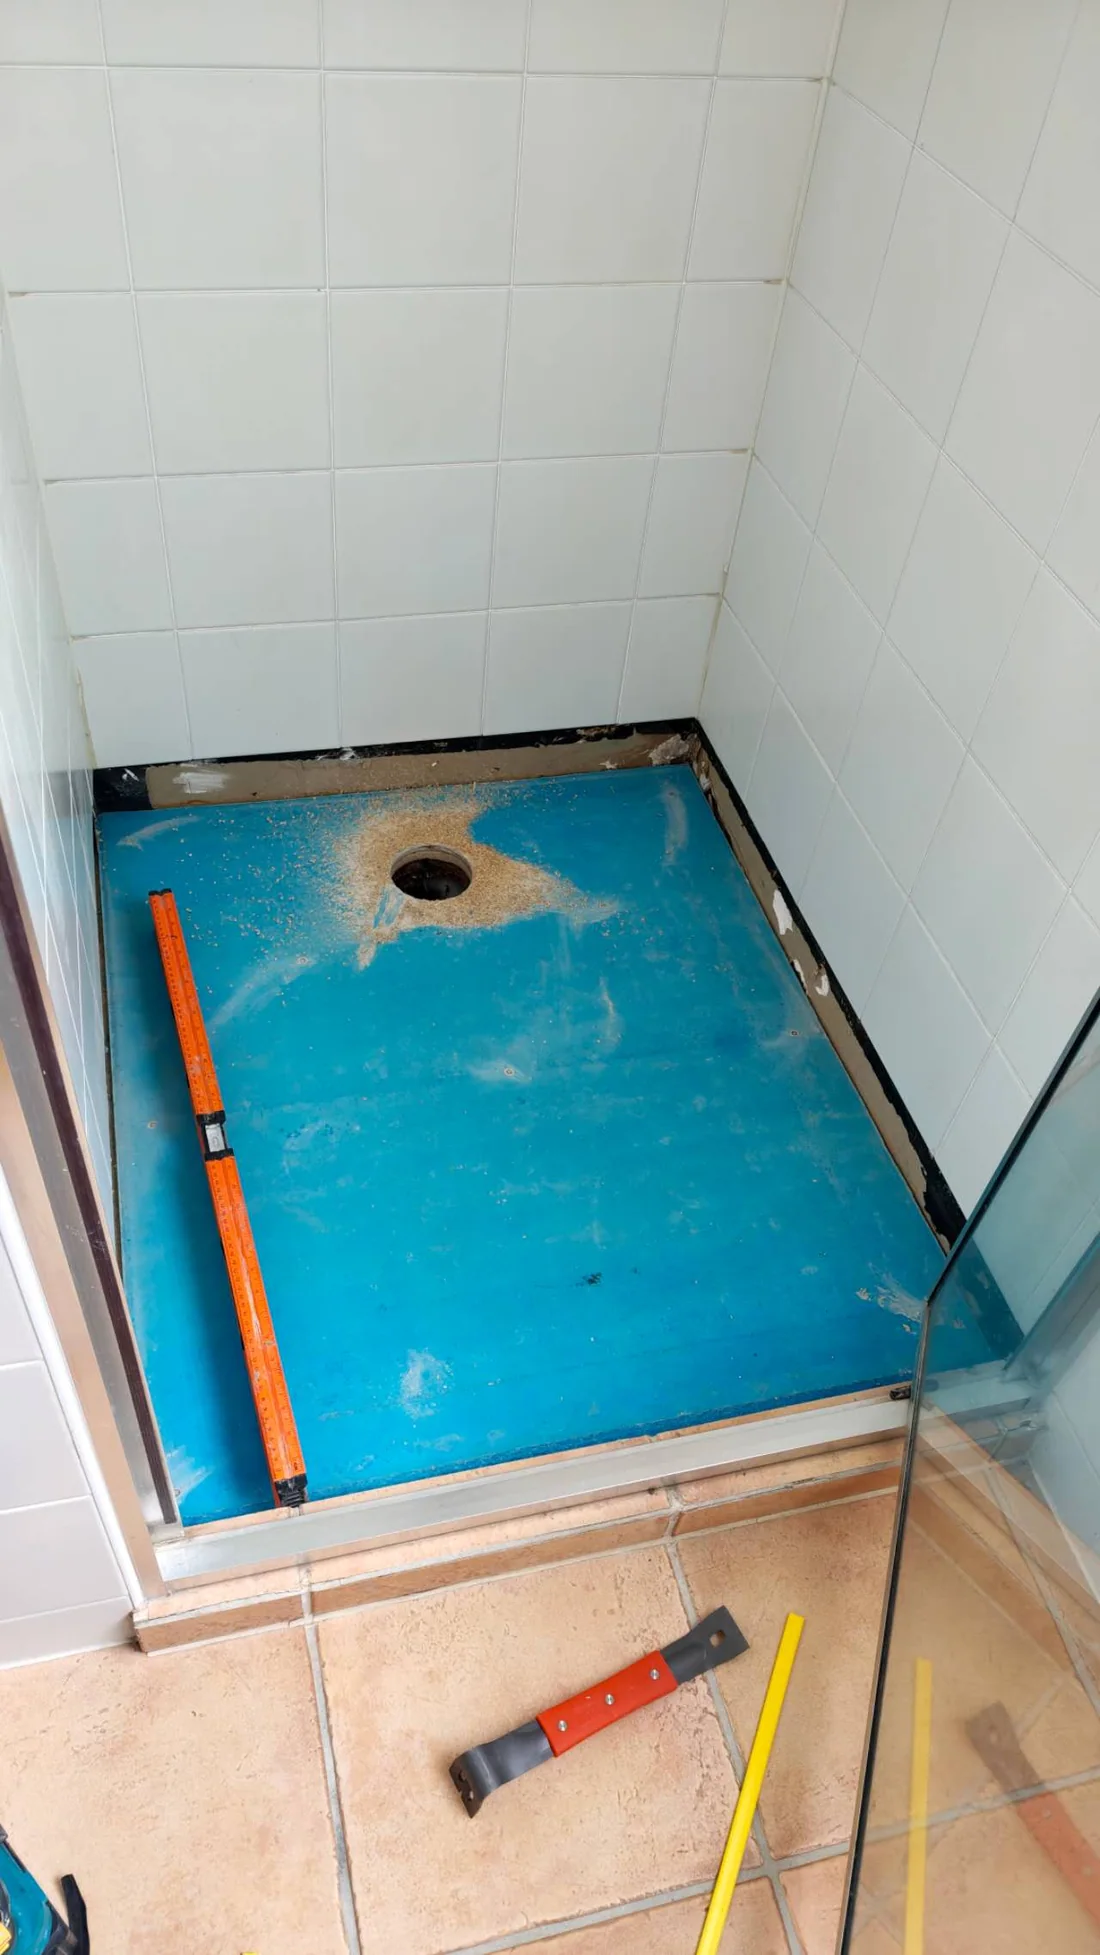
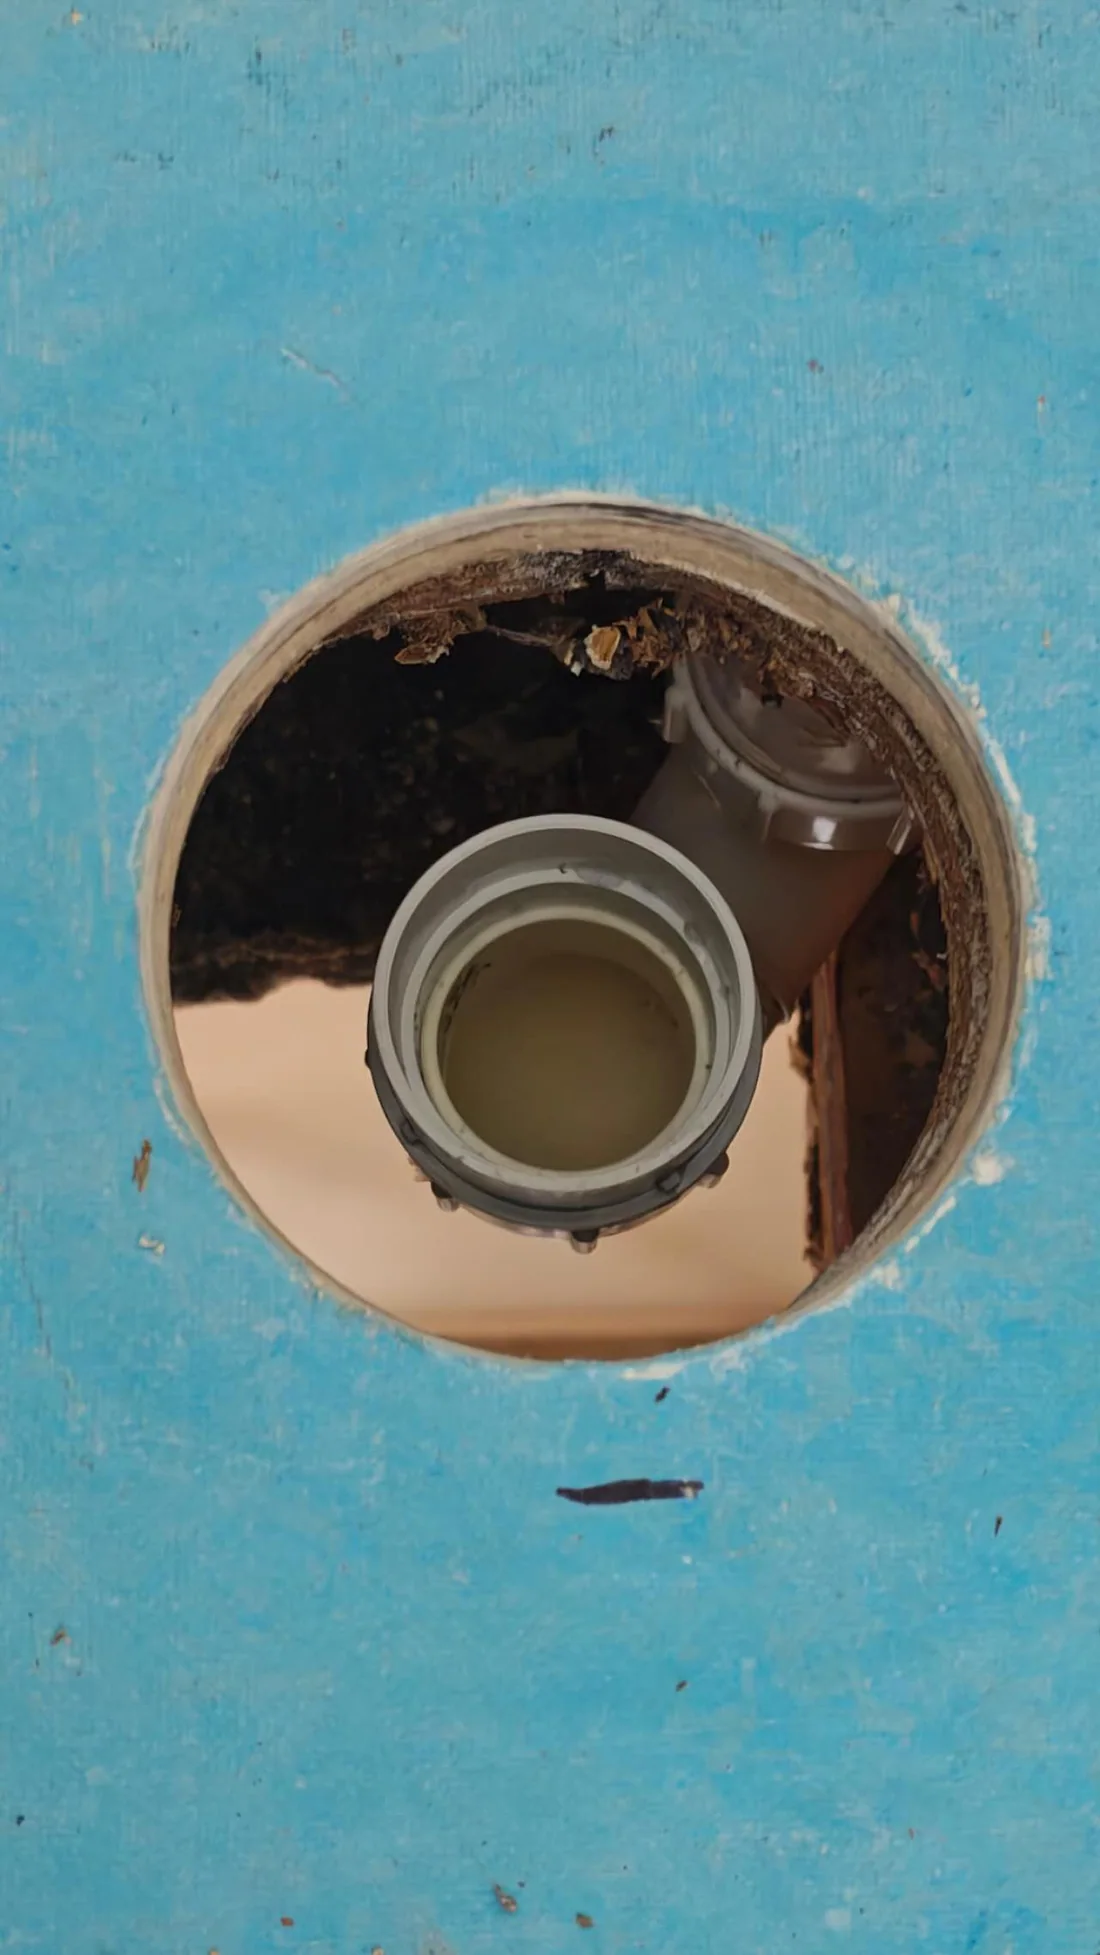
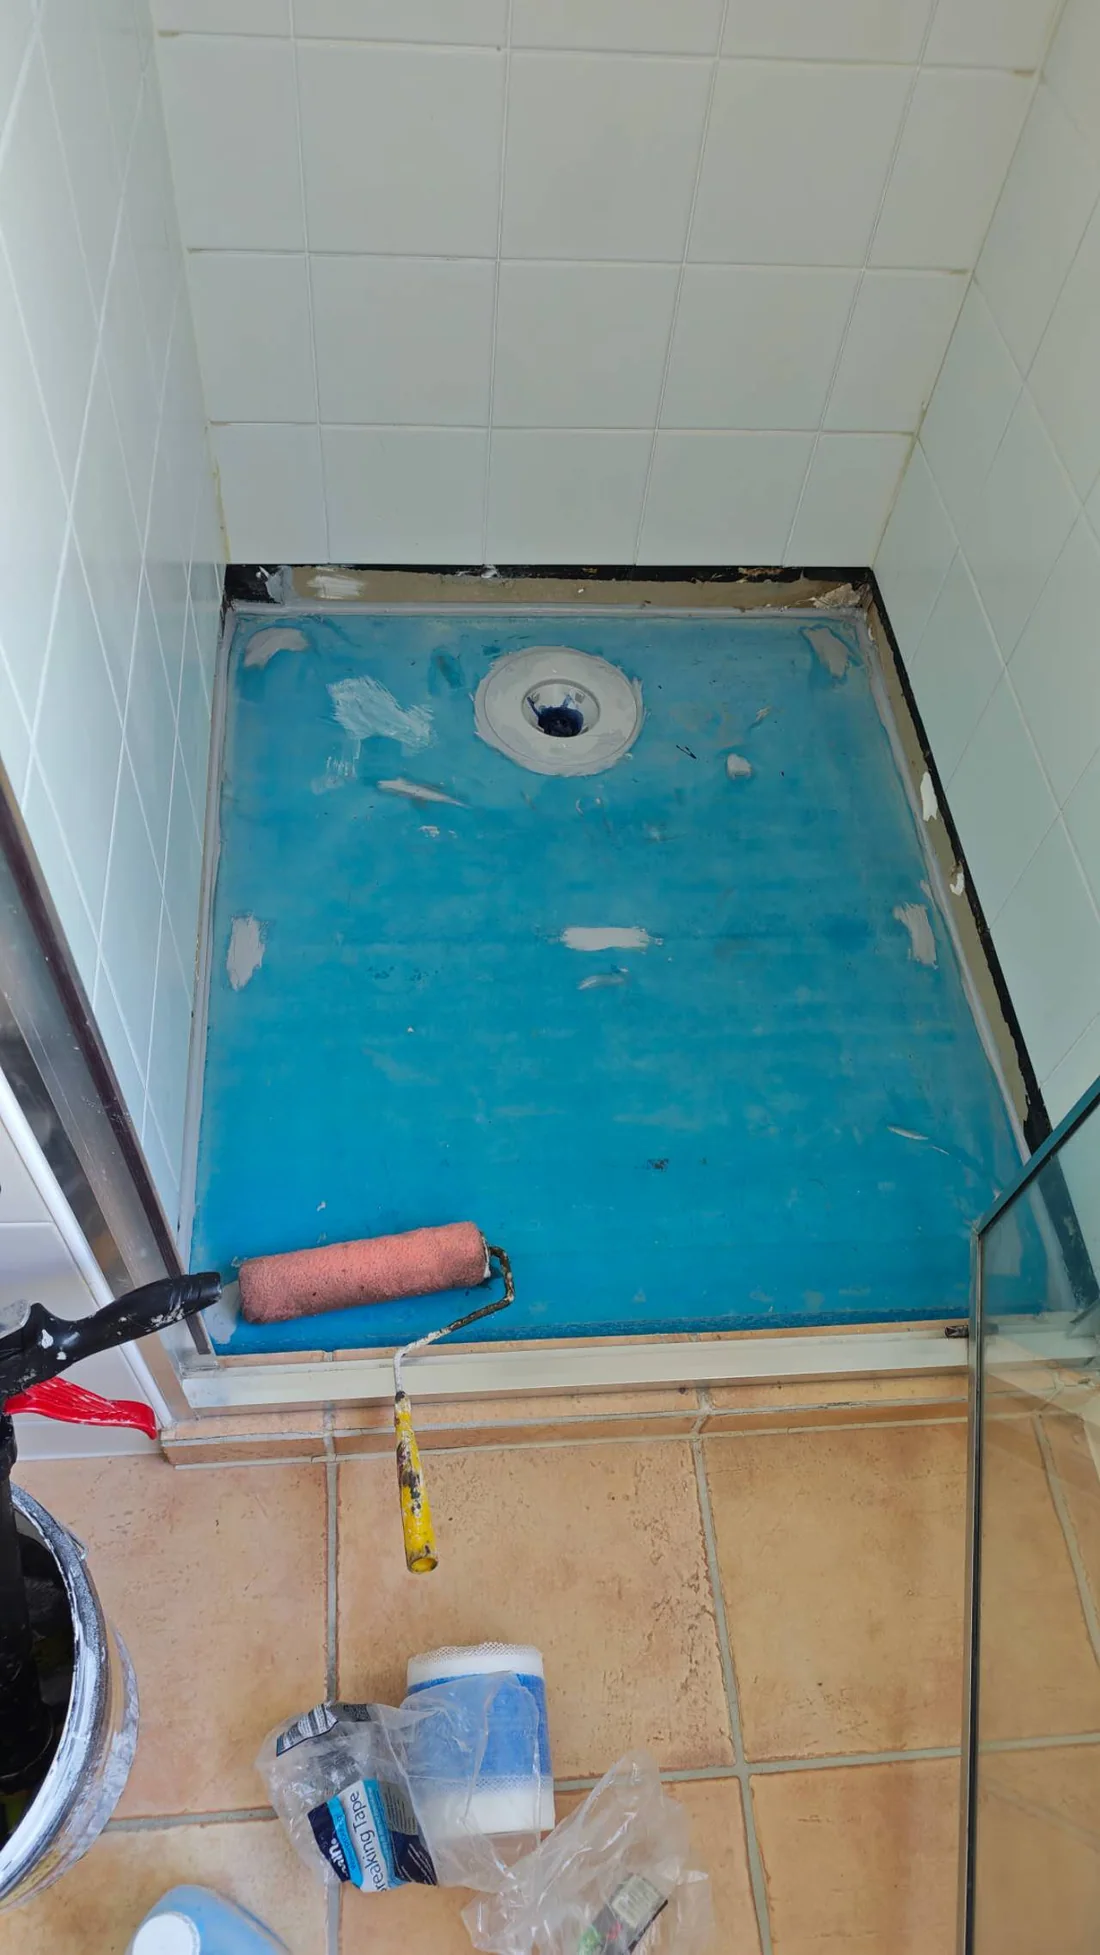
Shower-base preparation and drain-opening details

Four site photos record base-board fitting, the drain opening and preparation around the perimeter and drain in the same shower enclosure. The lower wall junction remains exposed, showing details before the finishes are closed up.

Boards fitted within the shower enclosure, with the lower wall junction exposed during the work.

Base-board fitting

Boards fitted within the shower enclosure, with the lower wall junction exposed during the work.

The blue-faced base panel with a circular drain opening and a level alongside it.

Drain opening

The blue-faced base panel with a circular drain opening and a level alongside it.

A close view through the opening shows the panel edge and the drain fitting below.

Opening close-up

A close view through the opening shows the panel edge and the drain fitting below.

White material is visible around the drain opening and base perimeter during preparation, with the lower wall edge still exposed.

Perimeter and drain detail

White material is visible around the drain opening and base perimeter during preparation, with the lower wall edge still exposed.

This record shows the construction stage around the base and drain opening.